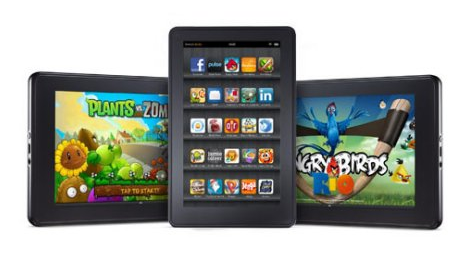
If you’re a developer and you’ve picked up the Kindle Fire this past week, you may still be in the Honeymoon period with the device. 🙂 If that is starting to wear off by now, you may have the inkling to try writing code for it. If you’ve previously developed software for Android, you’ll be a little worried when you first connect it up. Out of the box, you can’t develop with it right away.
Thankfully, it’s not too complex to get things working. Thanks to some existing blog posts, it was hardly difficult to figure it out. I thought I’d write up my install process, for anyone specifically developing on a Windows machine. I’m sure by now though, a week after launch there’s plenty of info out there. I’m also wanting to flex my blog-writing muscle again, just to get something written and maintain my recent uptick in pace.
For this blog post I’m assuming you’re using Windows 7. Earlier versions of Windows should work fine too, but the steps may be subtly different.
Unknown USB Device – Kindle
The first thing to address is that there’s one ‘Unknown Device’ when you connect the Kindle Fire to a Windows PC. I’m assuming you have the Android SDK installed, so if you haven’t got it you’ll want to install it from here.

Unknown Device: “Kindle”
Now, you’ll want driver support for this ‘Unknown Device’ so that you can use ‘adb’ with it. So, download this file:
![]() kindlefire_winusb.inf – Right-click and choose to “Save Link as…”
kindlefire_winusb.inf – Right-click and choose to “Save Link as…”
You’ll want to place it at a specific location, relative to the directory the Android SDK is installed to. It should go here:
- \extras\google\usb_driver
There should already be an ‘android_winusb.inf’ file in the same directory. My ‘kindlefire_winusb.inf’ is actually largely a copy of the contents of this other inf file; it simply has the USB hardware device IDs for the Kindle Fire listed now.
You can point Windows to this ‘usb_driver’ directory, if it’s currently trying to install that ‘Unknown Device’. Otherwise follow these steps:
- Go to Control Panel -> Administrative Tools -> Computer Management.
- Select the ‘Device Manager’ in the left-hand pane.
- Find ‘Kindle’ under ‘Other Devices’ (as shown in the above screenshot).
- Right-click on it, choose ‘Update Driver Software’.
- Tell these dialogs to locate the driver inside the same directory you copied the .inf file to: \extras\google\usb_driver under the Android SDK directory.
- That’s it. The device should now no longer appear under ‘Other Devices’. It ends up being ‘Android Phone’ -> ‘Android Composite ADB Interface’.
adb: No device found when Kindle Fire is connected
Though the Windows device itself is installed, this isn’t quite enough. If you attempt to deploy to it through adb, it won’t work yet.
The problem here is that adb doesn’t know about the Kindle Fire USB Device ID. It has to be given that ID explicitly via a .ini file. The “adb_usb.ini” file in question is located in this directory:
- c:\Users\*USERNAME*\.android

Editing: adb_usb.ini
So, open up “adb_usb.ini” in Notepad. Add this one single line, as shown above:
0x1949
Almost there now! Fire up a command prompt and navigate to your Android SDK /tools directory. Type the following commands:
- adb kill-server
- adb start-server
- adb devices
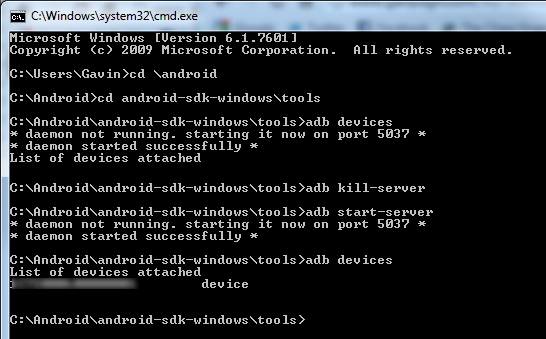
Restarting the adb server: The Kindle Fire lives!
If all went well, it should look like the above screenshot. There should be one device listed, which in this case would be your Kindle Fire.
Aside: Interestingly ‘android update adb’ as suggested in the text of ‘adb_usb.ini’, generates an error with the latest SDK R15 tools. ‘adb’ isn’t an accepted parameter to ‘update’. My Google-fu has failed to find a more permanent solution to adding this line. All references I can find to various other Android devices, encountering the same issues as the Kindle Fire, is just the same edit to ‘adb_usb.ini’.
All Done
That’s it! Your Kindle Fire will now behave just like any other Android device you may have developed with before.
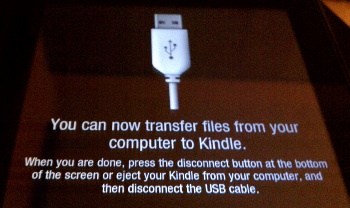
File Transfer / Disconnection screen
One thing to note, is that big black screen which the Kindle Fire displays: “You can now transfer files from your computer to Kindle”. This is just to serve the internal storage over the USB connection, as a mounted device. You can safely press ‘Disconnect’ and leave this screen, and still be able to debug without issue. As long as the cable remains connected, ‘adb’ will work fine.
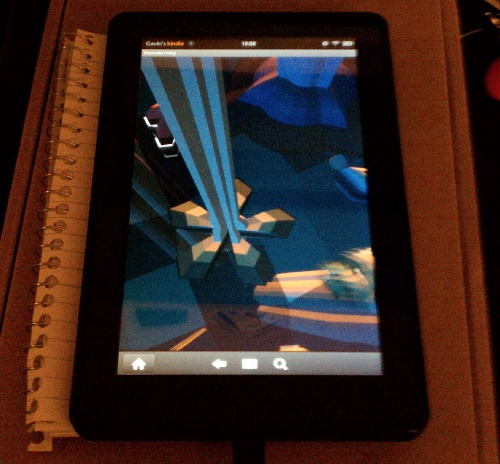
“San Angeles” demo running on my Kindle Fire, built by vs-android
Thankfully, vs-android worked just fine. Given I’ve only ever tested my personal cellphone with it; even though there’s no reason it shouldn’t have worked, I was nonetheless relieved that the Kindle fired up “San Angeles” without issue. 🙂
References
Comments
Be careful when you add the device id — make sure the “x” character is an actual x. When I copy and pasted the 0x1949, the “x” was replaced with some other character.
Thanks! I’ve fixed that up now.
I did all you said and my Kindle Fire now shows up as an android phone but I still do not have the .ini file in the c:\Users\*USERNAME*\.android folder. Am I missing something? Please help!!
According to this:
http://superuser.com/questions/364270/i-cant-find-adb-usb-ini
You need to run through the SDK Manager update once, to download the latest APIs.
[…] […]

Thanks for this post. It was quite helpful. Not sure when this change occurred, but adb(.exe) is now in the platform-tools directory, which is found at the same level as the tools directory. The tools directory has a file named adb_has_moved.txt that explains it.